Hardwood Floor Installation in Aurora , Centennial & Parker CO
There’s something about walking into a room with hardwood flooring that just hits different. The warmth, the character, the way light catches the grain. Homeowners across Centennial and the surrounding Denver metro area have been working with top-notch flooring & remodeling in Centennial to make the switch from carpet and laminate to solid wood for years now, and honestly, it makes sense. A well-installed wood floor can last generations with proper care, and it does wonders for home value when you decide to sell down the road.
But here’s the thing. Hardwood floor installation isn’t exactly a weekend DIY project you knock out between errands. The subfloor needs to be prepped correctly, the materials have to acclimate to your house, and without the right tools and technique, you’re looking at gaps, buckling, and a whole mess of problems six months from now. That’s where working with professional installers becomes less of a luxury and more of a necessity.
Enhancing Living Spaces with Expert Hardwood Floor Installation in Centennial, Colorado
We at Floor & More think that hardwood floors are the best way to make a home look elegant and beautiful for a long time. As experts in installing hardwood floors in Centennial, Colorado, we love creating attractive places and are dedicated to doing so. Whether you’re remodeling an existing home or starting from scratch, this is true. Our team works closely with you to choose the wood species, paint, and finish that best match your style. We carefully handle every step of the building process to ensure that your hardwood floors look great and last a long time.
Solid Hardwood Flooring
Solid hardwood flooring is made from a single, thick piece of wood. It has a classic, high-end look that never goes out of style. It is very durable and can be sanded and refinished many times, making it a great choice for people who want to make a long-term investment in their house.
Floating Installation
When you install floating hardwood, you connect the planks using a locking system. Without glue or nails, this lets them “float” over the current subfloor. This method is excellent for do-it-yourself jobs because it is easy to install and doesn’t require much preparation. They are flexible because they can be put down over different types of subfloors.
Glue-Down Installation
The hardwood planks are stuck straight to the subfloor with a special glue for glue-down installation. This method works great for concrete subfloors or areas that tend to get wet and works exceptionally well for engineered hardwood. The glue-down method ensures the bond is strong and lowers the chance of noise or movement between the planks. It also adds extra warmth and comfort to the ground beneath your feet.
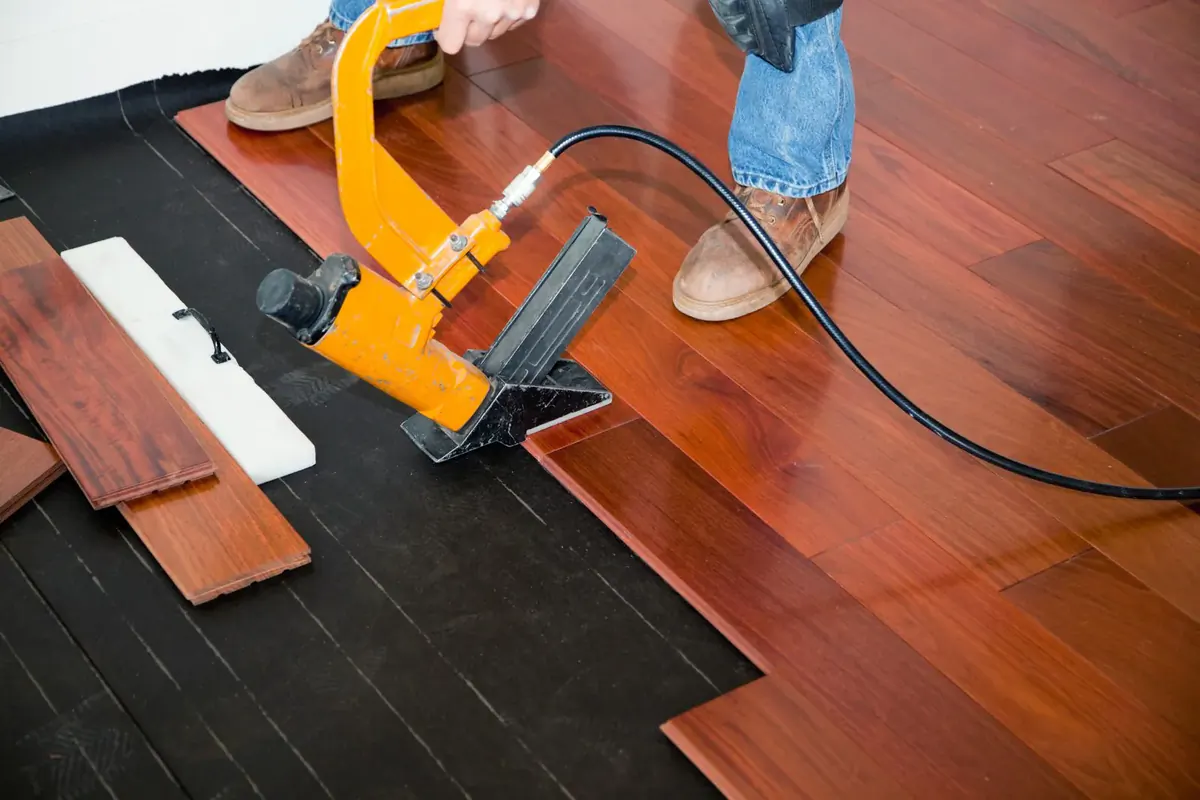
Nail-Down Installation
A traditional way to install flooring is to nail or staple the planks to a wooden subfloor. This is mostly done with solid hardwood flooring. This method works well with wooden subfloors and creates a strong, stable connection that can handle a lot of foot traffic. Installing flooring with nails stops it from moving and gives it a strong feel, which is great for areas with a lot of foot traffic and ensures it will last for a long time.
Solid Hardwood vs Engineered Hardwood Planks
Before getting into the installation process itself, it helps to understand what you’re actually putting down. Solid hardwood flooring is exactly what it sounds like: a single piece of wood cut from whatever species you choose. Oak, walnut, maple, hickory, and white oak. These floors can be refinished multiple times over their lifespan because there’s enough material to sand down and start fresh whenever scratches and wear accumulate.
Engineered hardwood consists of a real wood veneer on top with layers of plywood or composite materials underneath. The construction makes it more stable in spaces where humidity fluctuates, like basements or rooms over concrete. Depending on veneer thickness, you can still sand and refinish engineered wood, just not as many times as solid. Both options have their place depending on your room layout, the existing flooring situation, and what kind of durability you need for your household traffic.
What Happens During the Installation Process
So the crew shows up. Now what? The first thing any experienced team does is assess the subfloor. If you’ve got old carpet being removed, there might be staples, adhesive residue, or moisture issues hiding underneath. Plywood subfloors need to be level and structurally sound. Concrete requires a vapor barrier to prevent moisture from seeping up into the wood over time.
Once the subfloor checks out, the flooring materials need time to adjust to your home’s environment. Wood expands and contracts based on temperature and humidity, so letting the planks sit in the space for several days to a couple weeks prevents warping after installation. The first row gets set along the longest, most visible wall, and installers work outward from there. Depending on the method, they might use a flooring nailer for tongue and groove boards, a brad nailer for tighter spots, or face nail the final row where a standard nailer can’t reach.
Expansion gaps along the walls are non-negotiable. Wood needs room to breathe as seasons change, and skipping this step leads to buckling floors that push against your walls. The next row staggers the joints so seams don’t line up, which creates that seamless look and adds structural integrity. Hand tools come out for the tricky cuts around doorframes and corners. And yeah, there’s usually some wood putty involved to fill nail holes before the finishing touches.
Choosing the Right Wood Species for Your Space
This part’s actually kind of fun. The wood types you pick affect everything from color and grain pattern to how well the floor holds up against pets, kids, and heavy furniture. White oak has been trending hard lately because of its durability and neutral tone that works with almost any design direction. Hickory runs on the harder side, so it resists dents better than softer species. Walnut gives you those rich, darker tones if that’s the desired aesthetic you’re going for. Maple lands somewhere in between with a clean, consistent grain.
Floor & More stocks a wide variety of hardwood options at their Centennial showroom, which honestly saves a lot of back and forth compared to ordering swatches online and hoping they match what shows up. Seeing the wood in person under actual lighting conditions makes the decision way easier.
What Affects Installation Costs
Nobody loves talking about money, but installation costs vary pretty significantly based on a few factors. Square footage is the obvious one. A small bedroom costs less than redoing an entire main floor. The condition of your existing flooring matters too. If there’s carpet to remove, old tile to demo, or subfloor repairs needed, that adds labor and potentially dump fees for hauling away debris.
The wood species you select plays a role since exotic hardwoods cost more than domestic options like oak or maple. Room layout complexity factors in as well. A perfectly straight rectangular space installs faster than a room with lots of angles, closets, and transitions to other flooring types. And if your floor joists need reinforcement or your subfloor isn’t level, those repairs happen before any hardwood goes down.
Getting a detailed estimate upfront prevents surprises. Floor & More offers free consultations where they assess your space, discuss flooring options, and break down what you’re looking at cost-wise before any work begins.
Why Professional Installers Make the Difference
Look, YouTube makes everything seem doable. And sure, some people have successfully tackled hardwood floor installation on their own. But there’s a reason seasoned installers exist. They have the specialized tools, the technique from hundreds of completed jobs, and the ability to troubleshoot problems on the fly. That slightly uneven subfloor? They know how to handle it. The awkward corner by the fireplace? They’ve seen it before.
Professional work also tends to come with warranties and accountability. If something goes sideways, you have recourse. With DIY, you’re on your own, and fixing mistakes often costs more than hiring someone correctly the first time. The right tools alone can run hundreds of dollars for equipment you’ll use once, and improper installation voids manufacturer warranties on the flooring materials themselves.
Keeping Your Hardwood Floors Looking Fresh
After all that effort getting the floors installed, maintenance matters. Felt pads under furniture legs prevent scratches when chairs slide. Regular sweeping or vacuuming keeps grit from grinding into the finish. Spills get wiped up quickly because standing water and wood don’t mix. And when the time comes, sanding and refinishing brings everything back to life without replacing the entire floor.
Hardwood genuinely rewards you for taking care of it. Decades of use, the patina that develops over time, the way it anchors a room. It’s an investment that pays off visually and financially.
For homeowners in Centennial, Aurora, Parker, and the greater Denver metro area ready to install hardwood floors, the process starts with a conversation. Picking the right wood, understanding what your space needs, and working with a team that knows what they’re doing. That’s the formula.
Give Your Interiors a Defining Edge with Top-Notch Hardwood Floor Installation from Floor & More
If you choose wooden floors, you invest in beauty and durability. At Floor & More, we’re dedicated to giving you results that exceed your expectations. Because we care about quality and pay attention to detail, your wooden floors will last long and make your home feel warm and elegant. We promise you’ll love the change because we’ll install it professionally and use only the best materials.
Other Services We Offer: